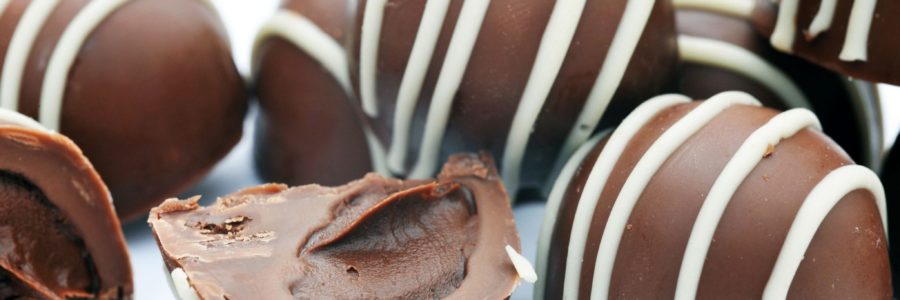
Filling:
- ¾ cup melted butter (or ½ cup melted butter and ¼ cup melted coconut oil)
- 1 cup heavy whipping cream (not whipped up)
- 1 ½ cup vanilla flavoured grass fed protein powder
- 4 tbsp finely ground erythritol to powder (I grind my in a hand held coffee grinder)
- 1 tsp stevia extract powder
- 2 full droppers of English Toffee Sweetleaf Stevia
Outer Chocolate Coating Ingredients:
- 200gm of unsweetened baking chocolate
- 2-3 tbsp melted coconut oil
- ¼ cup finely ground erythritol powder
- ½-1 tsp stevia extract powder
- You will also need toothpicks
Filling Directions:
- In a sauce pan melt butter.
- While butter is melting in a mixing bowl pour in whipping cream (unwhipped)
- Add protein powder and mix well
- Add remaining ingredients (not the butter) and mix well
- Pour butter (or butter/coconut oil mixture) into the cream mixture and mix well.
- It should be thick. On a silicone baking sheet drop tsp mounds onto the sheet. If they do not hold their shape then put the whole mixture into the fridge for it to thicken up/harden. Then make mounds on cookie sheet. I make about 50 of them.
- You might need 2 sheets. When finished put them into the fridge to go firm (I put my in the freezer for about 15 mins) While waiting you can start the outer chocolate coating.
Outer Chocolate Coating Directions:
- In a sauce pan (the one from the melted butter/coconut oil) melt coconut oil.
- Ad the finely ground erythritol powder and stevia.
- Add the unsweetened dark chocolate and melt it on low – medium heat stirring constantly. When full melted remove from heat.
- Make sure to do this in this order, as adding the erythritol later and cause the chocolate to go a horrible consistency and you’ll have to start the outer chocolate coating all over again.
Covering the Filling:
- Remove 1 tray of the fillings from the fridge/freezer
- Remove the fillings from the sheet (so they aren’t stuck).
- Insert toothpicks into about 10 mounds. Tipping the sauce pan to the side, to make a deep dipping section, dip a mound into the chocolate covering it completely and gently tap the toothpick on the pan to remove extra chocolate. Place back unto the baking sheet and do the next one. When all the toothpick ones are done, gently twist and lift the toothpick from the first one done and put it into a new mound and dip into chocolate. Continue doing this until all of them are finished.
- Remove all the toothpicks and using a spoon dip some of the chocolate unto in to the spoon and use it to cover the little holes left in the top of the chocolates from the toothpicks.
- Put into freezer when finished and do the next tray and put into freezer when finished.
- After both trays are done, wait about 5 or 10 minutes and remove them from the freezer. Remove them from the baking sheet and put them in a container and store in the freezer, they do not go rock hard in the inside but the outside becomes nice and crispy. Take out and eat them as you want one. For a softer one you can store in the fridge.


